
When it comes to styling, the hardworking parts of our homes often draw the short straw. But if your heart sinks every time you look at the shabby shed at the bottom of your garden or your tatty-looking garage, don’t despair. Transforming these eyesores into stylish, decorative features is easier, cheaper and more rewarding than you might think.
A fresh look for an old eyesore
“It’s easy to get excited about sprucing up a living area or bedroom, but the practical parts of our home are no less deserving of attention,” says Andrea Lucena-Orr, Dulux colour expert.
“What many people don’t realise is how big an impact they can have on your home’s overall look. The garage, for example, can make up around thirty percent of your home’s façade – if it’s not looking its best, that’s a whole lot of unattractive on display for the world to see.
“Equally, a shed that’s seen better days can really bring down the look of your garden. It’s details like these that friends and family as well as potential buyers really notice.
“Rather than splashing out on expensive replacements, update what you’ve got with colour. A lick of paint will transform unsightly sheds or garages. It’s quicker and easier than you might expect too – just a few hours over a day or two and your dumping grounds will be transformed,” she says.
“Start with a thorough declutter. Clear out the shed or garage of anything you no longer need or use, then organise the rest into proper storage. Prep the surface of your garage door or shed – if it’s damaged or old, this stage will probably take longer than the actual painting.
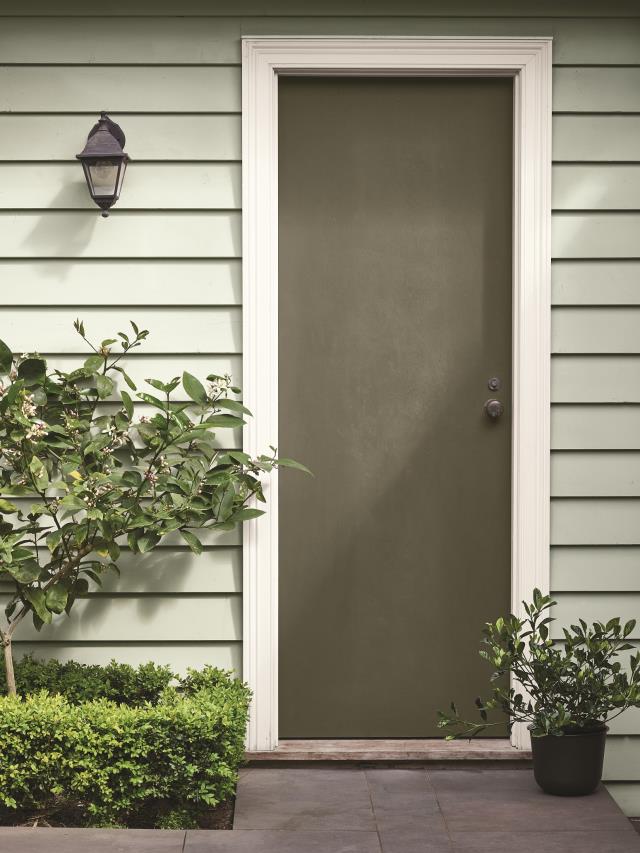
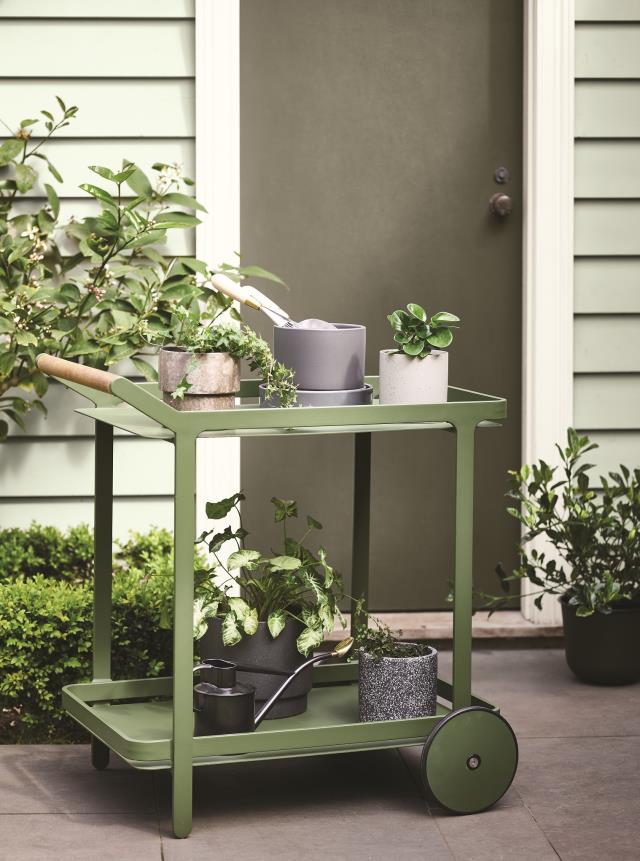
“When it comes to choosing colour, think about what you’d like to achieve. Do you want your shed or garage to blend into the background or make a statement? Muted greens will add freshness to a tired exterior and they harmonise beautifully with plants and foliage. Tone-on-tone combinations are popular right now; consider soft green for walls, a richer shade for the shed door and white with a hint of green for trims. Complete the look by painting shelving and planters in a tonal green.“
For garage doors, the colour expert said it is important to pay attention to the colours and finishes of surrounding walls. Matte black, charcoal, navy and stone can work well against red brick, natural stone and timber.
For an exposed area such as the garage or shed, it’s crucial to choose a paint that can withstand the elements. Dulux Weathershield is weather-resistant and provides a tough, long-lasting finish. It’s easy to apply, mould, dirt-and stain-resistant, and can be used on anything from bricks, timber and aluminium to ironwork – generally without the need for a primer.
“Show these hardworking areas of your home a little love and you may just find you want to spend more time in them!” says Ms Lucena-Orr.
GARAGE AND SHED WALL REFRESH DIY STEPS
1: Gather your painting supplies and ensure the surface has been properly prepared (sanded and washed) prior to starting to paint. Follow the label on the Dulux Weathershield can for more information.
2: Once the surface is dry, start by cutting in around the edges and hard to reach areas using Dulux Weathershield.
3: Apply paint to the surface using short, horizontal brush strokes.
4: Smooth over the wet painted section with long brush strokes. Do not reload the brush when you do this, a few strokes should be enough to smooth the surface.
5: Repeat this process for the second coat. Allow to dry, then give the surface a light sand with 400 grit sandpaper and repeat for a second coat
6: If painting bare timber a third coat will need to be applied.
GARAGE AND SHED DOOR REFRESH DIY STEPS
1: Gather your painting supplies and ensure the surface has been properly prepared (sanded and washed) prior to starting to paint. Follow the label on the Dulux Weathershield can for more information.
2: Once the surface is dry, apply Dulux Weathershield to the surface using long brush strokes, starting with the inner panels and working your way out.
3: Smooth over the wet painted section with long brush strokes. Do not reload the brush when you do this, a few strokes should be enough to smooth the surface.
4: Repeat this process for the second coat. Allow to dry, then give the surface a light sand with 400 grit sandpaper and repeat for a second coat.
5. If painting bare timber a third coat will need to be applied.